Thursday, April 28, 2022

Ways to Prevent Carpet Molds and Mildew

When you have a family and pets, your carpet is constantly taking a beating. Not only do kids and animals track in dirt and mud, but they can also create spills and accidents that can leave your flooring vulnerable to mold and mildew. Fortunately, there are some simple things you can do to help prevent these unsightly growths from occurring.

Ways to Prevent Carpet Molds and Mildew

Keep moisture under control

A humidity level of 65 percent or lower tends to be the perfect level for maintaining a mold-free carpet.

You can lower humidity in a contained area by running a portable dehumidifier or providing airflow by leaving windows and doors open as needed. Don’t open the windows if outdoor humidity is high.

Other conditions that deliver greater amounts of moisture to the basement must be check in check, as well:

  • Look outside, at the ground around the basement. The earth should be sloped away from the house to prevent groundwater and run-off from moving back toward the house.
  • Gutters and downspouts need to deliver rainwater well away from the house, usually 4 or more feet.
  • The gutters need to be kept clean in order to prevent overflow.
  • Garden ponds or any other yard feature that collects water should be situated well away from the house. Source: TheSpruce

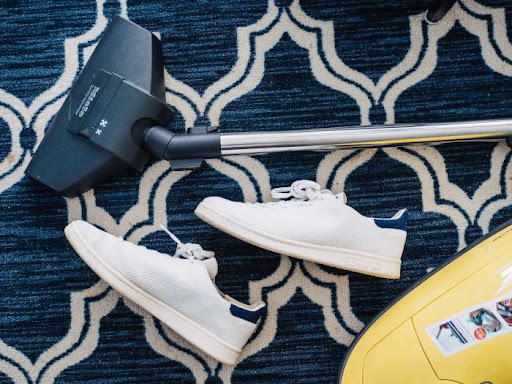
Maintain a regular carpet cleaning schedule

Make a habit of cleaning your carpet regularly, especially if you have pets and kids. Carpets tend to trap dust, dirt, allergens, germs while pets have spills and accidents on the carpet from time to time. Hence, it’s essential to clean the mess as soon as possible to avoid mold and other potentially serious health risks.

Studies also show that a clean carpet is highly resistant to mold growths. Dirt contains mold spores and moisture. And when mixed with your home’s humidity levels, it creates conditions conducive to mold growth.

Here how you can properly clean and maintain your carpet:

  • Vacuum regularly. You should vacuum at least several times a week, but if you have pets, its best to do it every day. Vacuum slowly and make two slow passes over high-traffic areas. Also, invest in a good quality vacuum cleaner that will seek out dirt hidden within your carpet pile.
  • Clean spills immediately to avoid carpet damage.
  • Deep clean every six months. Vacuuming doesn’t always cut it. Deep cleaning not only improves your carpet’s look and feel but also extend its life while reducing risks of health problems. You can opt to hire professionals or do it yourself. Always pretreat stained and high-traffic areas before the deep cleaning. Source: ReadyToDIY

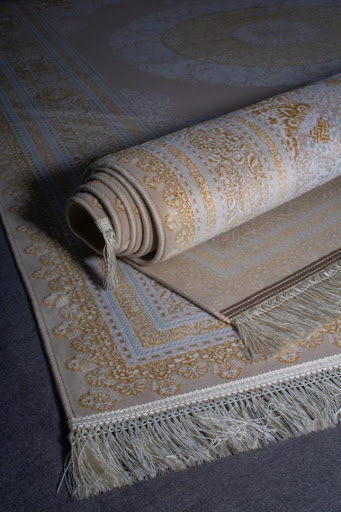
Invest in quality carpet padding

Padding or cushions not only add softness to your carpet and protect your flooring but also helps increase your carpet’s longevity. In fact, a test revealed that carpets without cushions tend to lose more pile height than carpets that have them. High-grade carpet padding also features moisture barriers that can deter liquid from spreading and shield subfloors from mold and mildew. However, be aware that leaks and floods can still damage carpet padding, which means damaged carpets will eventually need replacing.

Carpet padding is a pricey investment, but the protection that carpet padding can provide against mold growth is worth it in the long run. Source: HomeStratosphere

Don’t know what to do with moldy carpet? Call us! We’ll be more than happy to help.

The post Ways to Prevent Carpet Molds and Mildew appeared first on Curlys Carpet Repair.


from Curlys Carpet Repair https://ift.tt/e1gbUWc

Thursday, April 21, 2022

Types of Grout

Grout is a material used to fill the spaces between tiles in order to keep them in place and prevent water from seeping through. There are several types of grout, each with its own set of benefits and drawbacks. Which one is right for your project? Let’s take a look at the most common types of grout and find out!

Sanded vs. Unsanded

Sanded cementitious grouts include fairly large sand particles that can be seen and felt—they look and feel gritty. Sanded grout is normally recommended when the grout seams are 1/8 inch wide or more, as the sand provides extra bonding power that prevents cracking. Some care is required if using sanded grouts on highly polished tiles, as the sand can actually scratch the surfaces. Testing the grout on sample tile is a good idea.

Unsanded grouts have a much smoother texture, since the mineral particles they contain are very fine powders that have no noticeable grit. They are used with grout seams that are 1/16 to 1/8 inch wide. When used with with wider seams, unsanded grouts have a tendency to crack because they lack the binding power offered by sanded grouts. Source: TheBalancesMB

Epoxy 

There are some settings — notably those exposed to acids and greases — in which even an additive-enhanced, sealed grout falls short. Such harsh conditions call for epoxy grout. Made up of two parts, resin and hardener, epoxy grout comes in both sanded and unsanded varieties and is impervious to most chemicals and stains. Early epoxies were unforgiving and difficult to apply, and had just a 45-minute pot life. This made them fast to cure but slow to be embraced by many tile setters, and anathema to beginners.

The new generation of epoxies contain detergents in the hardeners, which make for quick cleanup with water and improve workability. Because epoxy can discolor porous surfaces, such as unglazed quarry tiles or limestone, these should be sealed before grouting. But its stain resistance, hardness, and durability make epoxy grout the best choice for showers, kitchen counters, backsplashes, floors, and other heavy-traffic areas. Source: ThisOldHouse

Polymer 

Differing from an epoxy grout, polymer tile grout ensures color quality. It can come in handy for disguising irregularities in handmade tiles and bridging the joint thickness in some patterned installations. It is considered high-performance and is designed for more demanding spaces.

Polymer tile grout is cement-based with added polymers that are activated once they hit water. The chemical reaction increases the grout’s water, abrasion, and chemical resistance and adds an incredible amount of strength.

Polymer tile grout is a single component material that is completely stain proof. The first generation was made from urethane and the newer types are a form of siliconized acrylic. Urethane allows for manufacturers to make a translucent grout for glass installations and is easier to clean up than acrylic. Source: ArchToolbox

Not sure which type of grout is best suited for your needs? Call us for free advice!

The post Types of Grout appeared first on Curlys Carpet Repair.


from Curlys Carpet Repair https://ift.tt/MIcBm1D

Wednesday, April 13, 2022

Replacing Torn Carpet

No one wants to see their nice, clean carpet ripped to shreds. Unfortunately, accidents happen, and when they do, it’s important to know how to properly fix the damaged area. In this post, we’ll go over the steps necessary for replacing torn carpet like a pro. So, whether you’re a DIY novice or a seasoned handyperson, read on for some helpful tips!

Replacing Torn Carpet

Take the torn area out

Cut a square out of the carpet, taking care to completely surround the torn section. Make as small a cut as possible that will encompass the entire area of the tear. Use a carpenter’s square to help you cut straight lines. Slice through the carpet with a utility knife, cutting through carpet, but not the padding. Remove the cutout piece of carpet. If necessary, use the end of a putty knife to pry the carpet up. Source: Hunker

Replace with a new carpet

Then, using the damaged piece as a template, take a carpet remnant and trim it to fit the new space. Cut it from underneath. Use one-sided carpet-seam tape to surround the hole, with part underneath the old carpet and part sticking out so it’s underneath the new piece. Then secure it in place, making sure the fibers “flow” in the same direction. Don’t use double-sided tape, as you don’t want to stick the piece to the floor. It should “float,” like the rest of the carpet does.

Seaming tape can be either pressure-activated or heat-activated to produce a strong bond. If you opt for heat-activated tape, which is stronger, you’ll need a special carpet iron to apply heat. You can also use a standard clothing iron with a damp towel as a buffer to swipe over the surface for about 60 seconds, moving carefully the entire time. If you find this tricky—too much heat might melt the carpet fibers, and possibly your entire home if you’re not careful—opt for the pressure-activated tape. Source: MentalFloss

Additional tips

If you don’t have a remnant, you can steal a piece from inside a closet or underneath a piece of furniture you never intend to move. (This may sound extreme, but it’s a lot cheaper than replacing the entire carpet.)

If you have a “plush”-type carpet with a flat surface and no pattern, you can make a repair that’s absolutely invisible. If your carpet has a color pattern, a textured surface design or looped yarn, you’ll have to be fussier when you cut the plug, and the repair may be visible (but you’re probably the only one who will notice it). Source: FamilyHandyman

Got any flooring-related concerns at home? Feel free to contact us anytime for some pro advice!

The post Replacing Torn Carpet appeared first on Curlys Carpet Repair.


from Curlys Carpet Repair https://ift.tt/wjUxnJW

Friday, April 8, 2022

How to Fix Hardwood Floor Warping

If you’ve been living in your home for a while, you may have started to notice that your hardwood floors are starting to warp. This is a common problem, but it’s not one that has to be tolerated. Here are a few tips on how to fix hardwood floor warping so that your floors look good as new once again.

How to Fix Hardwood Floor Warping

Causes

Wood can warp when it gets wet and swells, then dries out and contracts. This doesn’t usually happen to properly finished hardwood flooring because the boards are protected against moisture, particularly if a vapor barrier has been properly installed on the subfloor. If the vapor barrier is inadequate, however, or the finish is excessively worn, the boards can absorb moisture. When the moisture evaporates, the boards may cup or crown. They can warp even if they don’t get wet. Excessively dry conditions, high temperatures and direct sunlight can shrink the wood and create gaps between the boards. Source: HomeGuides.SFGate

Sanding as first step

The first method to fix a warped floor is to sand it. This works best for warps that come from humidity or a water spill rather than from a leak that originated below your flooring. Sand down the bump in your flooring until it is level with the rest of the floor. Keep in mind that this will require an aggressive amount of sanding in most instances. That means that about a quarter of thickness could be given up in this process, which is something to consider.

Solution for minor warping

You can fix a small warp issue quite easily. As long as the wood is still pliable, it can be fixed by moistening the area slightly, then placing a heavy object like a barbell or a cinderblock on top. Leave the weight for several days and let gravity do its job. After those few days have passed, remove it and see if the warped area is fixed. If the warp is still present, treat the issue like a large warp, as detailed below. Source: DoItYourself

Solution for major warping

If your flooring does not return to normal after this method, then you’re dealing with serious warping which will probably require removal and replacement. Luckily, this does not mean you have to replace your entire floor. You can “steal” planks from an inconspicuous place like a closet or under the refrigerator. These stolen planks will be a perfect match to your original flooring, and thus they make the best replacements. You can then compensate for the stolen planks with the closest match you can find. Source: Networx

Need help with chipped hardwood and other flooring-related concerns? Give us a call and we’ll be happy to help!

The post How to Fix Hardwood Floor Warping appeared first on Curlys Carpet Repair.


from Curlys Carpet Repair https://ift.tt/ZW6JUr0