Friday, August 26, 2022

Useful Grouting Tips You Should Know

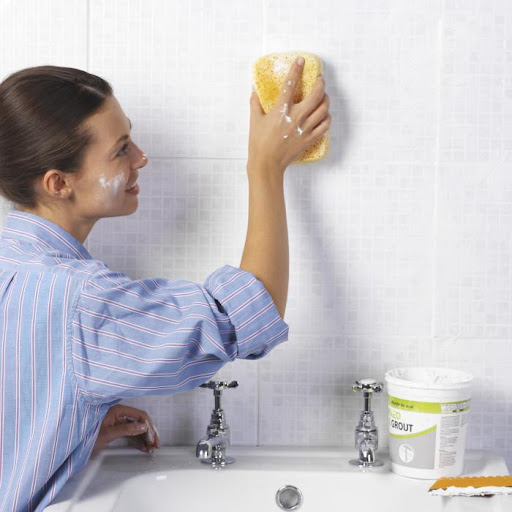
There’s no doubt that grouting is a necessary step in any tiling project, but it can also be tricky. If you don’t do it right, you could end up with a messy and uneven floor or wall. Here are some tips to help you grout like a pro!

Useful Grouting Tips You Should Know

Allow the grout to slake

It’s tempting to skip this step, but it’s important to let the grout set for 10 minutes after mixing. This step, called slaking, allows the water to completely moisten the dry ingredients. Remix the grout after the slaking period and adjust the mixture by adding a little more powder or water until you reach the viscosity of mayonnaise. Be careful, though—it doesn’t take much of either to radically change the consistency. Source: FamilyHandyman

Mix it right

Knowing how to mix grout is the step that trips a lot of people up when grouting tile. But, get your mixing right, and the whole process will be a lot easier.

First and foremost, don’t mix up too much grout at a time. The grout you mix up is only good for about half an hour anyway, so try to mix up no more than you can use in that time. Once you’re done, mix some more.

Along the same lines, avoid mixing whole bags of grout. Getting the consistency right means you might have to add more powder later. If the grout is too runny and you’ve used up your whole bag, you’ve got no way of making the mix thicker.

As for the right consistency, your grout shouldn’t drip or fall when you apply it. As a guide, aim for grout that spreads like creamy peanut butter. Source: Rubi

Grout in small areas

Apply from a quart to a half gallon of grout mixture to your tiles and get to work. Using a grout float, work the grout into the joints at a 45-degree angle. A 45-degree angle is very important, and it refers to the angle at which you hold the float. Make sweeping arcs and work the grout completely into all the joints between the tiles. You can also use your grout float to wipe away excess grout as you go. Work in sections, rather than trying to grout the entire wall or floor of tile at once. Source: ArchitecturalDigest

Invest in quality tiling installation. Call us!

The post Useful Grouting Tips You Should Know appeared first on Curlys Carpet Repair.


from Curlys Carpet Repair https://ift.tt/rVuBEFs

Thursday, August 18, 2022

Difference Between Caulk and Grout

Caulk and grout are two important materials used in home improvement projects. However, many people don’t know the difference between the two. This blog post will explain the differences between caulking and grouting, and when you should use each one.

Difference Between Caulk and Grout

Properties

Grout is a masonry product that comes as a dry powder in a bag. It requires mixing with water to activate its adhesive properties, which become rock-hard when the grout cures. Caulk is a flexible, semi-liquid product made from latex, silicone, or acrylic that is packaged in tubes. Unlike grout, caulk retains a measure of flexibility after it cures, allowing it to stretch slightly if any movement, such as the house settling, occurs. Source: BobVila

Usage

Grout is applied using float. It is applied between tiles to join them thus creating an even surface. However, grout generally does not suit on planes that are 90 degrees to each due to its lack of flexibility and waterproof qualities. The epoxy type of grout is somehow flexible and waterproof as well, but it is expensive and thus rarely used. 

Caulk is applied on planes of different materials that are 90 degrees to each other. It is flexible, and so it seals the joints to prevent any water leakage. Because of its susceptibility to breakage, caulk is seldom applied in large projects. Moreover, it is not a good idea to replace grout with caulk due to the difference in strength. Source: DifferenceBetween

Additional tips

Because it’s flexible and can handle slight movement, caulk is used at corners instead of grout. For a good tile installation, apply a neat bead of matching caulk at vulnerable areas like along the tub or countertop and at inside corners. But to achieve a good-quality caulk joint, you’ll first have to remove the grout from these areas. Most home centers and tile shops will have caulk to match the color of your grout. Source: FamilyHandyman

Looking to clean the grout on your flooring? Give us a call!

The post Difference Between Caulk and Grout appeared first on Curlys Carpet Repair.


from Curlys Carpet Repair https://ift.tt/R7djTc2

Thursday, August 11, 2022

How to Repair Crumbling Grout

When you look at your tiles, do you see any cracks or crumbling grout? If so, don’t panic! There is no need to replace the tiles. You can fix the problem yourself by repairing the grout. In this blog post, we will show you how to do it. Keep reading to learn more.

How to Repair Crumbling Grout

Remove the old grout

You will need to use a special grout saw to effectively remove the damaged grout and prevent your tiles from becoming damaged. As you use the saw, be sure to do so with careful, gentle motions. Aim the saw directly into the grout lines and avoid using it on the tile itself whenever possible. While you remove the old grout, use even, steady motions and push the saw directly into the grout. Wear safety goggles for additional protection. Source: BuildDirect

Match the color 

Unless you’re replacing all the grout in your space, you’ll need to find a replacement that’s as close to the original color as possible. Otherwise, it’ll be very obvious where you regrout.

You can get help by taking a piece of your old grout to a home improvement store. An employee might be able to color-match the sample to one of their products. Source: Angi

Replace with new grout

Prepare the grout mixture according to manufacturer instructions, if it is not premixed. If you have a large area to address, divide the work area into sections and only prepare the amount of grout that you will use in 15 minutes.

Place grout over the spaces where it is needed and pack it into the gaps with your finger or a rubber grout float. If you are using a rubber grout float, hold the float at a 30-degree angle to spread the material out and force it into the joints, then run the float over the tiling at an almost 90-degree angle. Make sure your movements are oriented diagonally to the joints to avoid digging the grout out.

Wipe excess grout off of the surface of the tiles with a damp, clean sponge.

Wipe all residue off of the tile surface with a clean, dry cloth about 15 minutes after you use the damp sponge.

Seal grout or apply a colorant to the grout joints about a week or so after you repair the grout, once the grout has completely dried. Source: HomeGuides.SFGate

Need help with grout cleaning or tile repair? Give us a call to get a free estimate!

The post How to Repair Crumbling Grout appeared first on Curlys Carpet Repair.


from Curlys Carpet Repair https://ift.tt/B9Eq2Rm

Sunday, August 7, 2022

Carpet Roll vs. Carpet Tiles

Whether you’re installing new flooring in your home or just freshening up the existing carpet, you have a couple of options to choose from: carpet rolls or carpet tiles. Both have their pros and cons, so which is right for you? Here’s a breakdown of the differences between these two types of carpeting.

Carpet Roll vs. Carpet Tiles

Installation

Carpet tiles aren’t hard to install compared to traditional carpets. Since modular mats are smaller, they can be simply placed in various areas. Even inexperienced do-it-yourselfers could install modular carpets in their rooms. Yet, to ensure better placement, professional carpet installers need to be hired. Source: TheArchitectsDiary

Cost

One of the biggest disadvantages of carpet sheets is the cost as they’re more expensive than tiles. Carpet sheets can run up to four times the price of a regular floor, which can really add up.

Carpet tiles, on the other hand, can let you save in the long run. Instead of purchasing a large carpet that you’ll have to replace over time, you can choose to buy a smaller quantity of carpeting. This helps cut down on costs, since you won’t have to deal with replacing damaged sections often. Source: IndustryToday

Appearance

Even with perfect installation of carpet tiles, it’s hard to get rid of all the rough edges. A standard carpet gives a smooth, uniform look throughout a room, but carpet tiles may not quite fit perfectly together. Also, when you have carpet tiles, you’re going to see frayed joints and seams more often because more of them are exposed. So if that seamless look is important to you, this might not be the right option.

Warping

Carpet tiles have a rubber backer that can become warped over time. While the rubber is what makes them more durable than carpets and suitable for some outdoor environments, this also puts them at risk of warping due to extreme temperatures. Source: Angi

Can’t decide which one is better suited for your needs? Give us a call! We’ll help you find the best flooring option for your budget and lifestyle.

The post Carpet Roll vs. Carpet Tiles appeared first on Curlys Carpet Repair.


from Curlys Carpet Repair https://ift.tt/j41EuAk